DIY Simple Pallet Shed Plans: A Quick and Affordable Project
Tired of cluttered garages and overflowing storage spaces? Yearning for a practical, inexpensive solution to your storage woes? Then building your own pallet shed is the perfect project for you! This guide provides simple, step-by-step plans to construct a surprisingly sturdy and functional shed using reclaimed pallets â€" minimizing costs and maximizing your DIY satisfaction. Get ready to transform your outdoor space and conquer your storage challenges!
Gathering Your Materials: A Pallet-Perfect Start
The beauty of this project lies in its resourcefulness. Reclaimed pallets form the heart of your shed. Source them responsibly â€" check with local businesses, construction sites, or even browse online classifieds. Inspect each pallet carefully; ensure they're sturdy and free from rot or significant damage. You'll need approximately 10-15 pallets, depending on the desired size of your shed. Beyond the pallets, gather these essential materials:
- Screws: Choose exterior-grade screws for lasting durability.
- Hammer and Nails (optional): Useful for reinforcing certain areas.
- Measuring Tape and Level: Crucial for accurate construction.
- Saw (circular saw recommended): For cutting and adjusting pallets to fit your design.
- Safety Glasses and Gloves: Protect yourself throughout the construction process.
- Post Mix Concrete: To secure the base.
- Wood Preservative (optional): To extend the life of your shed.
Constructing the Foundation: A Solid Base
Begin by establishing a level and sturdy foundation. You can create a simple base using concrete posts set into the ground. Dig four holes, each approximately 12-18 inches deep, at the corners of your desired shed dimensions. Carefully set your concrete posts into these holes, ensuring they're perfectly level. Fill the holes with concrete mix, allowing ample time for it to fully cure before proceeding. This foundation guarantees stability and longevity for your pallet shed.
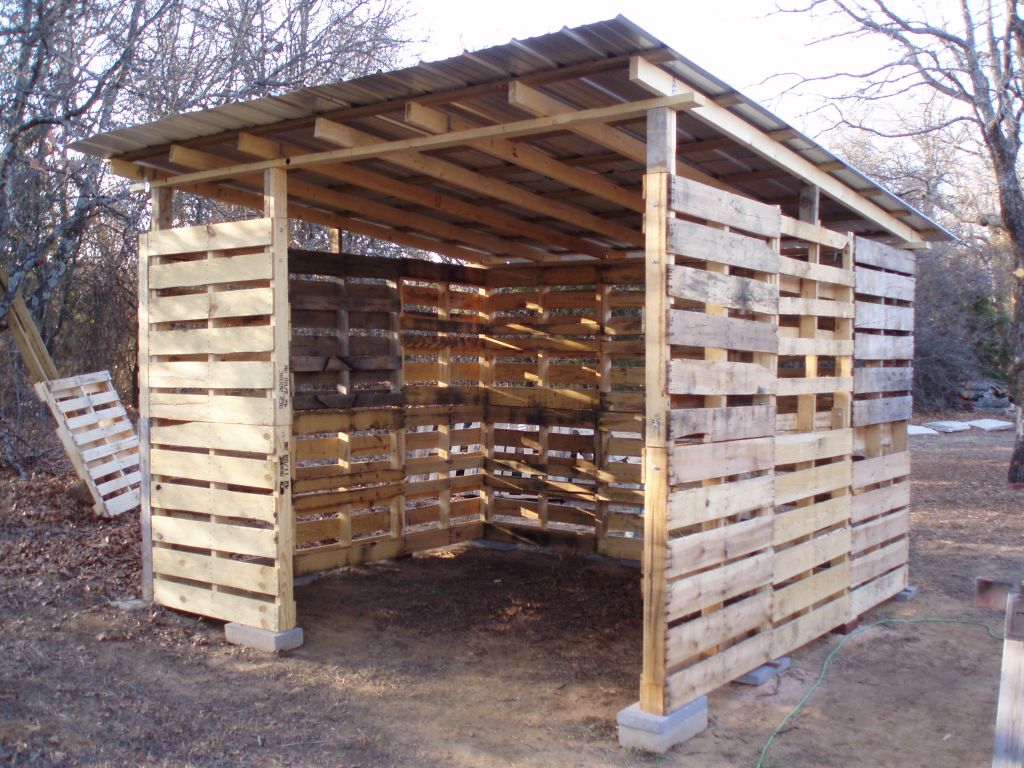
Assembling the Walls: Pallet by Pallet
Once the concrete foundation is solid, you'll start assembling the walls. This process involves carefully arranging and securing your reclaimed pallets. Begin by creating a frame using four pallets positioned upright and secured with screws. This frame forms the base for the walls. Add more pallets, ensuring each one is tightly fastened to the next. You can adjust pallet positioning for windows or doors, and even cut them to size if necessary. Remember to prioritize even spacing and secure fastening for stability.
Roofing and Finishing Touches: The Finishing Line
Building the roof is the next step. You can create a simple gabled roof using additional pallets, angled to create a sloping structure. Again, secure them using screws, ensuring a strong, weather-resistant structure. Consider adding tar or roofing felt to protect against the elements. After constructing the roof, you might want to add a simple door â€" reclaimed from an old door or constructed from more pallets. Once the structure is complete, you can apply a wood preservative to enhance the longevity of your shed. Remember to follow the manufacturer's instructions carefully.
And there you have it! Your very own DIY pallet shed, built with minimal cost and maximum effort. Enjoy your new storage solution, knowing you've built something practical, attractive, and entirely your own.
Sign up here with your email
ConversionConversion EmoticonEmoticon
Note: only a member of this blog may post a comment.